
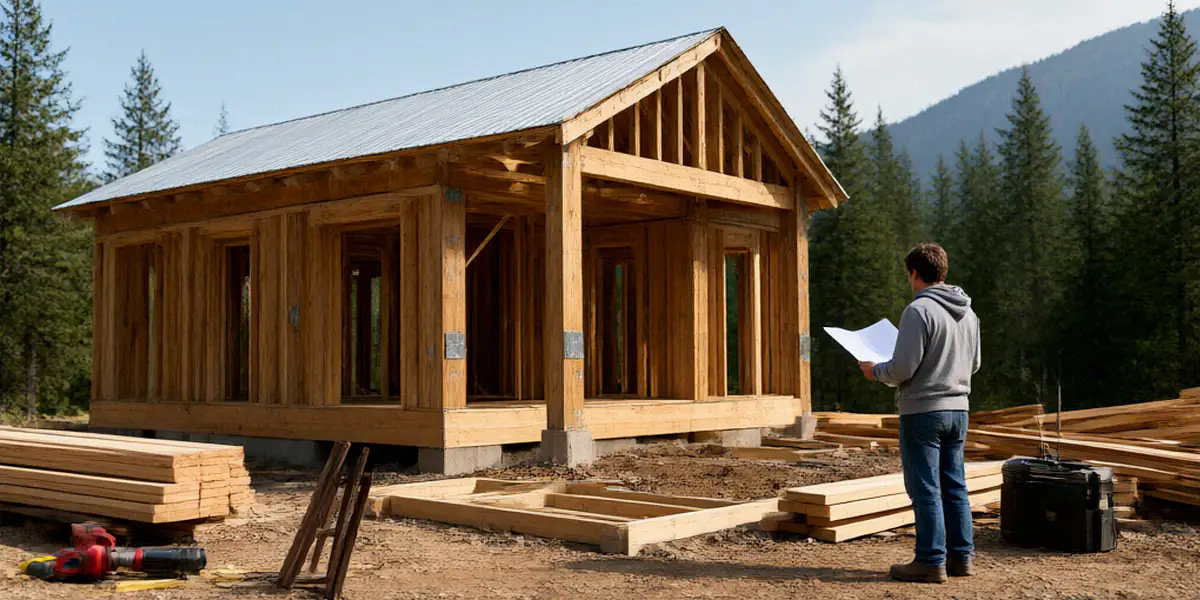
Build Your Home Yourself: Self-Build and Renovation Guide
It usually happens on a Sunday evening, somewhere between the third episode of a renovation marathon and the moment you notice the crooked cabinet door in your own kitchen. Maybe you’re standing in a drafty living room in Sudbury in January, watching frost creep along the bottom of a window frame, and something clicks. You think: I could do this myself. Not the televised version with its dramatic reveals and sponsored tools — the real version, with permits, inspections, budgets, and a lot of coffee. That moment is exactly where our journey began, and it’s probably where yours is beginning too. This guide is our attempt to hand you everything we wish someone had handed us: a plain-language roadmap to self-build and home renovation in Canada, from the first permit application to the final inspection, with the honest numbers and cold-climate realities nobody puts in the highlight reel.
Why We Chose the Owner-Builder Path in Canada
The decision to become an owner-builder rarely comes down to a single spreadsheet. For us, it was a mix of math and stubbornness. Hiring a general contractor for a full build in most Canadian markets adds a management layer that can run 15 to 25 percent of the total project cost, and when you’re staring down a $450,000 build, that’s a lot of money to hand over for coordination you think you can partly handle yourself. The emotional appeal is just as strong: an owner-built home is yours in a way a contractor-built home never quite is. You know where every stud is, why that joist was doubled, and which wall hides the plumbing stack.
The Canada Mortgage and Housing Corporation (CMHC) provides resources for owner-builders, including guidance on financing, construction basics, and the specific risks that come with managing your own project. We leaned on CMHC material heavily in our first year, particularly their explanations of how owner-built homes are financed and insured differently from contractor-built ones. It’s not glamorous reading, but it’s the difference between a project that survives and one that stalls halfway through framing.
Then there’s the Canadian climate, which does not care about your timeline. Our first foundation pour was delayed eleven days by an unseasonable October snow in the Ottawa Valley. A friend building near Saskatoon lost three weeks to a wet spring that turned his excavation into a mud pit. If you’re planning a self-build in Canada, the weather isn’t a variable — it’s a co-author of your schedule.
The Real Costs of Self-Build vs. Hiring a General Contractor
Let’s talk numbers, because this is where most owner-builder dreams either get grounded or get unrealistic. On a typical Canadian custom home in the $400,000 to $600,000 range, a general contractor’s fee — sometimes called the builder’s margin — usually lands between 15 and 25 percent of hard construction costs. On a $500,000 build, that’s $75,000 to $125,000. If you act as your own general contractor and sub out the trades you can’t legally or safely do yourself, you can realistically capture a meaningful chunk of that margin.
But here’s the part the YouTube videos skip: you will spend some of that savings on mistakes. We budgeted a 12 percent contingency and burned through most of it on a framing error that required an engineer’s fix and a re-inspection. Our advice is to treat your contingency as sacred. It is not a slush fund for upgraded countertops.
A rough comparison of what we’ve seen across three owner-builder projects in Ontario and Alberta:
- General contractor route: Higher total cost, lower time commitment, warranty coverage handled for you, easier financing and insurance.
- Owner-builder route: Lower total cost (if you’re disciplined), much higher time commitment (often a second full-time job), you carry the warranty and liability, and financing requires more legwork.
- Hybrid route: Hire a contractor for shell and foundation, self-manage interior finishing. This is what we recommend for first-timers — it caps your risk on the technically demanding parts while still saving money on the labour-heavy finishes.
Owner-Builder Risks: Financing, Insurance, and Liability in Canada
Financing an owner-built home in Canada is a different animal from financing a purchase. Most major lenders treat owner-builder projects as higher risk, which means they often want to see a detailed budget, a realistic schedule, proof of builder’s risk insurance, and sometimes a licensed contractor attached to at least the structural phases. Draw mortgages — where funds are released in stages as work is completed and inspected — are common, but they require you to front money and get reimbursed, which means you need cash flow.
Insurance is the other hurdle. Standard homeowner policies won’t cover a home under construction. You need builder’s risk insurance, and you need to confirm it covers owner-builder scenarios specifically. Liability is real: if a sub-trade gets injured on your site and you haven’t properly documented their coverage, you can be exposed. We require every trade we hire to provide a certificate of insurance and a WSIB (or provincial equivalent) clearance before they set foot on site.
Warranty is another Canadian-specific wrinkle. Provinces with mandatory home warranty programs — Ontario, BC, Alberta, and Quebec among them — have rules about whether owner-builders must enrol, and whether you can sell the home within a certain period without providing warranty coverage. In Ontario, for example, an owner-built home that is occupied by the owner-builder and not sold is typically exempt, but the moment you sell within the warranty period, different rules kick in. Confirm your province’s specifics before you pour a foundation.
How Canadian Climate Shapes Our Build Timelines
Canadian construction seasons are not suggestions. In most of the country, the practical window for excavation, foundation work, and exterior framing runs from late April to early October. North of about 55 degrees latitude, or in the Prairies where frost can hit in September, that window shrinks further. Concrete cannot be poured safely below certain temperatures without heated enclosures and accelerators, which add cost and complexity.
We plan our builds around three climate realities:
- Frost depth. Footings must sit below the local frost line — that’s 1.2 metres in much of southern Ontario, deeper in parts of Manitoba and Alberta. This affects foundation cost and schedule.
- Freeze-thaw cycles. These are the enemy of exterior finishes, driveways, and anything porous. Materials must be rated for it.
- Winter interior work. Once the shell is closed and heated, interior work can continue through winter. We deliberately schedule drywall, cabinetry, and finishing for the cold months.
Building Permits Canada: What Every Owner-Builder Must Know
Permits are where self-build enthusiasm meets municipal reality. The good news is that Canada’s permit system, while fragmented across provinces and municipalities, is navigable if you understand the framework. The Canadian Commission on Building and Fire Codes maintains the National Building Code, which provinces adopt and adapt. Ontario’s Building Code Act governs permits in Ontario, and it’s enforced by municipal building departments and the provincial ministry. BC’s Building Act sets the framework in British Columbia, with the BC Building Code as the technical standard. Municipal offices in Toronto and Vancouver each have their own application portals, timelines, and quirks.
What this means practically is that there is no single “Canada permit.” You apply to your local authority having jurisdiction (AHJ), and what that authority requires can vary dramatically even between neighbouring townships.
When You Need a Permit (and When You Don’t)
The general rule across Canada: if you’re changing the structure, the envelope, the plumbing, the electrical, or the use of a space, you need a permit. If you’re painting, replacing like-for-like finishes, or doing minor cosmetic work, you usually don’t.
You almost certainly need a permit for:
- New home construction or additions of any size
- Structural alterations — removing or adding walls, beams, or posts
- Decks more than 24 inches above grade (varies by municipality)
- Finishing a basement, especially if adding a bedroom or bathroom
- Window and door replacements that change the size of the opening
- Any plumbing or electrical work (which also requires licensed trades in most provinces)
- Roof structure changes, including dormers
- Demolition of a structure
You usually don’t need a permit for:
- Interior painting, flooring, or trim
- Replacing a window with the same size and type
- Kitchen cabinet swaps that don’t move plumbing or electrical
- Fencing under a certain height (check local bylaws)
- Minor landscaping and grading that doesn’t affect drainage onto neighbouring properties
When in doubt, call your municipal building department. A five-minute phone call has saved us weeks of retroactive paperwork.
Navigating Municipal Inspections and Zoning Bylaws
Inspections are not the enemy. They’re a checkpoint system that protects you from expensive do-overs. Typical inspection stages for a new build include footings, foundation, framing, rough-in (electrical, plumbing, HVAC), insulation and vapour barrier, and final occupancy. Miss a stage and you may be required to open walls to expose work — a nightmare we’ve watched other builders endure.
Zoning bylaws are the other layer. They govern setbacks, height limits, lot coverage, parking requirements, and sometimes even exterior materials in heritage districts. In Toronto, for example, the city’s zoning bylaw and its many amendments can determine whether your dream addition is even legal before you spend a dollar on drawings. In Vancouver, the zoning and development bylaw plus the city’s energy requirements (the Zero Emissions Building Plan) add another layer.
We always pull the zoning summary for a property before we buy it. It’s free, it’s public, and it has killed more bad ideas than any contractor ever has.
Common Permit Delays and How We Avoid Them
Permit delays are the silent budget killer. Every week of delay costs you in carrying costs, rental, or lost momentum. The most common causes we’ve seen:
- Incomplete drawings. Missing elevations, no site plan, unclear structural notes. The reviewer sends it back, and you go to the end of the queue.
- Zoning variance needed. If your plan doesn’t meet the bylaw, you need a minor variance or rezoning, which adds months.
- Conservation authority or heritage review. If your property is near a waterway or in a heritage area, additional approvals apply.
- Engineer’s letters missing. Structural, truss, and HVAC designs often need stamped letters.
- Seasonal backlogs. Spring and early summer are peak permit season. Apply in late winter if you can.
Our approach: hire a local designer or architect who has submitted to your specific municipality before. They know the reviewers, the pet peeves, and the formatting. It’s the single best money we spend on any project.
Home Renovation Projects We Recommend for Canadian Homes
Not all renovations are created equal, and in Canada, the climate filters the list further. A renovation that makes sense in Arizona may be a waste of money in Manitoba. We focus on projects that deliver strong return on investment, withstand Canadian weather, and improve the home’s energy performance — because in a country where heating bills can rival mortgage payments, efficiency is value.
For materials, we lean on the big Canadian suppliers. Home Depot Canada and RONA are major suppliers for Canadian renovators, and both carry the climate-rated materials we need — pressure-treated lumber for anything touching ground, ice-and-water shield for roof edges, and closed-cell insulation for basements. Lowe’s Canada is another option, particularly for appliances and fixtures. For specialty lumber and building supplies, regional yards and co-ops often beat the big boxes on price and quality.
Basement Finishing: Moisture Control and Insulation
A finished basement is one of the highest-ROI renovations in most Canadian markets, adding usable square footage at a fraction of the cost of an addition. But basements are also where Canadian homes fail. Moisture is the enemy, and it comes from three directions: bulk water (leaks and grading), capillary action through the slab, and humid summer air condensing on cool surfaces.
Our basement finishing sequence:
- Assess and fix water first. No finishing until you’ve addressed exterior grading, downspouts, and any weeping tile issues. If there’s a crack, fix it.
- Insulate correctly. Rigid foam board against the concrete wall, taped and sealed, then framed walls. This keeps the warm side warm and prevents condensation.
- Use a subfloor system. Dricore or similar panels raise the finished floor off the slab, allowing minor moisture to dissipate.
- Control humidity. A properly sized dehumidifier or HRV is not optional in a Canadian basement.
- Vapour barrier placement matters. In most of Canada, the vapour barrier goes on the warm side of the insulation. Get this wrong and you create a mould farm.
Kitchen and Bath Updates That Withstand Canadian Humidity
Kitchens and bathrooms are the two rooms where humidity swings are most extreme, and where cheap materials fail fastest. In a Canadian bathroom, steam from showers meets cold exterior walls, and if the vapour barrier and ventilation aren’t right, you get peeling paint and mould within two winters.
What we specify:
- Bathroom exhaust fans rated for the room volume, vented to the exterior — never into the attic.
- Cement board or denser backer behind tile in wet areas, not standard drywall.
- Quartz or solid surface countertops in kitchens — they handle temperature swings and moisture better than laminate and don’t need sealing like granite.
- Ceramic or porcelain tile in bathrooms, with epoxy grout in showers.
- Maple or birch cabinetry with quality plywood boxes — particleboard swells when it gets wet.
Home Depot Canada and RONA both carry suitable materials, and both run regular promotions on vanities, fixtures, and tile that can shave real money off a bathroom refresh.
Energy Retrofits: Rebates from Enbridge and FortisBC
Energy retrofits are the renovation category where the math genuinely works in your favour, especially with rebates. Enbridge and FortisBC offer energy retrofit rebates that can cover a meaningful portion of the cost of upgrades like attic insulation, air sealing, high-efficiency furnaces, heat pumps, and window replacements. The exact programs change year to year, so always check the current offer before you commit.
Typical high-return retrofits:
- Attic insulation top-up. Cheap, fast, and one of the best paybacks in the country.
- Air sealing. Caulking, weatherstripping, and spray foam at rim joists and penetrations.
- Heat pump installation. Cold-climate heat pumps now work well below -25°C, and both federal and provincial rebates often apply.
- Window replacement. Covered in more detail in the next section.
- Basement insulation. Reduces heat loss and improves comfort.
Window Frames: Choosing the Right Option for Canadian Weather
If there’s one building component where Canadian climate punishes cheap choices hardest, it’s windows. A window that performs fine in Virginia can be a condensation factory in Winnipeg. The frame material, the glazing, the spacers, and the installation all matter — and they matter more here than almost anywhere else in the developed world.
Energy Star Canada certifies windows for energy efficiency, and the certification is climate-zone specific. A window rated for the warmest Canadian zone is not the same as one rated for the coldest. When you shop, look for the Energy Star label with the zone rating that matches your region. For most of Canada, you want the highest zone rating available.
Brands we’ve used and seen perform: JELD-WEN, Pella, and a range of regional manufacturers who often build better cold-climate products than the big names. Local manufacturers in Manitoba, Quebec, and the Maritimes frequently offer triple-glazed units at prices that compete with imported double-glazed ones.
Vinyl vs. Fiberglass vs. Wood: Pros and Cons
- Vinyl: Cheapest, low maintenance, decent thermal performance. Downsides: expands and contracts with temperature swings, can warp in extreme cold, colour options limited, and cheaper units have thin frames that hurt insulation value.
- Fiberglass: Excellent thermal performance, very stable across temperature ranges, strong, and available in more colours. More expensive than vinyl but often the best cold-climate choice. Pultruded fiberglass frames don’t conduct heat like aluminum and don’t warp like cheap vinyl.
- Wood: Beautiful, excellent insulator, repairable. Downsides: requires maintenance, can rot if water gets in, and needs protection from Canadian freeze-thaw. Wood-clad (wood interior, aluminum or vinyl exterior) is a popular compromise.
- Aluminum: Strong, thin profiles, low maintenance. But aluminum conducts heat and cold aggressively, so unless it has a thermal break, it’s a poor choice for Canadian winters.
Our default recommendation for most Canadian homes: fiberglass frames with triple glazing, argon fill, and warm-edge spacers. If budget is tight, high-quality vinyl with triple glazing is a reasonable second choice.
Installation Tips for Airtight Seals in Cold Climates
A great window installed badly performs worse than a mediocre window installed well. Air leakage around the frame is responsible for a huge share of heat loss and condensation problems. Our installation checklist:
- Flash the rough opening with a proper sill pan and membrane before the window goes in.
- Use low-expansion spray foam around the frame — not standard foam, which can bow the frame.
- Tape the exterior with a compatible house wrap tape, overlapped correctly.
- Seal the interior with a vapour-tight sealant or gasket, but leave a small gap at the bottom to allow any trapped moisture to escape.
- Check the reveal after installation — the gap should be even all around, and the window should open and close smoothly.
- Test with a smoke pencil or thermal camera on a cold day to find leaks before you close the walls.
Window Rebates and Grants Available in Canada
Window replacement is expensive, but rebates can help. The federal Canada Greener Homes program (and its successor programs) has offered grants for energy-efficient window upgrades, and provincial utilities like Enbridge and FortisBC offer their own retrofit rebates. In some provinces, there are additional top-ups for low-income households or for specific performance thresholds.
The catch: most rebate programs require pre-approval before you buy, and they require the windows to meet specific Energy Star or U-value thresholds. We always check the current program requirements before ordering, because buying first and applying later almost never works.
Our Team’s Step-by-Step Self-Build Roadmap
After several projects, we’ve refined a sequence that works. It’s not the only way, but it’s a way that has survived contact with Canadian weather, municipal inspectors, and material price shocks. We use Buildertrend for project management — scheduling, budget tracking, and communication with trades — and we source from a mix of big-box stores and regional suppliers like TimberMart for framing lumber and specialty materials.
One budgeting rule we never break: we assume material prices will rise 5 to 10 percent over the course of the build, and we build that assumption into our financing. Lumber in particular has been wildly volatile since 2020, and a budget that assumes stable prices is a budget that fails.
Phase 1: Planning, Budgeting, and Financing
This phase takes longer than most people expect — often six to twelve months. It includes:
- Land selection and due diligence (zoning, services, geotechnical, environmental)
- Design and drawings, ideally by a local designer familiar with your municipality
- Detailed budget with line items for every trade and material category
- Financing conversations with a lender experienced in construction or owner-builder mortgages
- Insurance setup (builder’s risk, liability)
- Contingency planning — we recommend 10 to 15 percent of hard costs
Phase 2: Permits, Site Prep, and Foundation
Once drawings are approved and permits are in hand, site work begins. This phase is weather-sensitive and schedule-critical:
- Site survey and layout
- Excavation and footing inspection
- Foundation walls, damp-proofing, and drainage
- Backfill and rough grading
- Foundation inspection and sign-off
Get the foundation right. Every problem above grade gets more expensive if the foundation is wrong.
Phase 3: Framing, Roofing, and Weatherproofing
This is the most visible and most satisfying phase. It’s also the phase where you want experienced trades on the critical path — framing errors compound. Sequence:
- Floor systems and walls
- Roof structure and sheathing
- Windows and exterior doors
- Roofing and exterior cladding
- House wrap and flashing details
- Framing inspection
Once the building is “dried in,” you can work through the winter with temporary heat.
Phase 4: Interior Systems and Finishing
The final phase is the longest and the one most owner-builders underestimate. Rough-ins, insulation, drywall, and finishes each take time and each depends on the previous step being done correctly.
- HVAC, electrical, and plumbing rough-in
- Insulation and vapour barrier — inspected before drywall
- Drywall, taping, and priming
- Flooring, trim, and doors
- Cabinetry, countertops, and fixtures
- Final inspections and occupancy permit
Budget twice as long for finishing as you think you need. Everyone does.
Ready to start your own build? Bookmark this guide, download our free owner-builder budget template, and join our community forum to ask questions from people who’ve been exactly where you are. The best time to start planning is today — the second-best time is before the snow flies.
FAQ
Do I need a licence to be an owner-builder in Canada?
In most provinces, you don’t need a contractor’s licence to build your own home for your own occupancy. However, you do need licensed trades for electrical, plumbing, and gas work, and you may need to demonstrate competency or provide additional documentation for certain permits. Some provinces, like Ontario and BC, have specific rules about owner-builder warranty obligations if you sell the home within a certain period. Always check with your provincial regulator and your municipal building department before starting.
How much can I realistically save by self-building in Canada?
Savings vary widely, but a realistic range for a hands-on owner-builder who acts as their own general contractor is 10 to 20 percent of total project cost, compared to hiring a full-service builder. The savings come from eliminating the builder’s margin and doing some labour yourself. However, mistakes, delays, and carrying costs can eat into those savings quickly. We recommend budgeting conservatively and treating any savings as a bonus, not a guarantee.
What’s the best window frame material for Canadian winters?
For most Canadian climates, fiberglass frames with triple glazing, argon fill, and warm-edge spacers offer the best combination of thermal performance, durability, and low maintenance. High-quality vinyl with triple glazing is a solid budget alternative. Wood is beautiful but requires more maintenance, and aluminum without a thermal break performs poorly in cold climates.
How long does it take to get a building permit in Canada?
Timelines vary enormously by municipality. A straightforward residential permit in a smaller town might take two to four weeks. In Toronto or Vancouver, expect eight to sixteen weeks for a new home, sometimes longer if a variance or additional review is required. Incomplete applications are the most common cause of delays, so invest in complete, professionally prepared drawings.
Are there rebates for energy-efficient renovations in Canada?
Yes. Enbridge and FortisBC offer energy retrofit rebates for upgrades like insulation, air sealing, heat pumps, and window replacement, and federal programs like the Canada Greener Homes initiative have provided grants for similar work. Programs change frequently, so check current eligibility and pre-approval requirements before you buy or install anything.
Self-building in Canada is not easy. It’s a long, weather-dependent, paperwork-heavy process that will test your patience, your marriage, and your credit card limit. But it’s also achievable. With thorough research, a realistic budget, local expertise on your team, and a willingness to learn from the mistakes you will inevitably make, you can end up with a home that fits your life, your climate, and your bank account far better than anything you could buy off the shelf. Start with the permits, respect the frost line, choose your windows carefully, and keep a healthy contingency. The rest is just one nail at a time.
Latest articles
- Self-Building in the Netherlands: Lessons for Canadians
 Self-Building in the Netherlands: Lessons for Canadians Last spring, our team spent two weeks cycling between self-build sites in Almere and Utrecht,…
- Owner-Builder in Canada: Permits and Rules
 Owner-Builder in Canada: Permits and Rules You Need to Know There’s nothing quite like the feeling of breaking ground on a home…
- Laundry Room Renovation on a Budget
 Laundry Room Renovation on a Budget: A Self-Build Guide for Canadians A cramped, dated laundry room does more than make wash day…
- Insulation Choices for Cold Climates
 Insulation Choices for Cold Climates: What Canadian Owner-Builders Need to Know The first winter after we framed up our self-build north of…
- Hiring Trades: What to DIY and What Not To
 Hiring Trades: What to DIY and What Not To You’ve got the plans spread across the kitchen table, a coffee that’s gone…
- Foundations 101: Slab, Crawlspace or Basement
 Foundations 101: Slab, Crawlspace or Basement Standing on a freshly excavated building site in Ontario last October, we watched a first-time owner-builder…